LA: Aegopodium podagraria EN: Goutweed FI: Vuohenputki JP: イワミツバ Location: Tampere Surrounding: Open field with good sun light. moist but not dump ground. Usually seen in clustered. Note: Strong and fast growing plant by root system. Easy to spot by flower, ID by leaves. Usually dominates the surrounding lower plants. Young leaves are edible.
LA: Achillea millefolium EN: Yarrow, Milfoil FI: Siankärsämö JP: セイヨウノコギリソウ(ヤロウ) Location: Tampere Surrounding: Open field with good sun light. moist but not dump ground. other shorter plants grows around it. Note: Easy to spot by flower, ID by leaves. Leaves are used as herb, for tea or sprinkled on food.
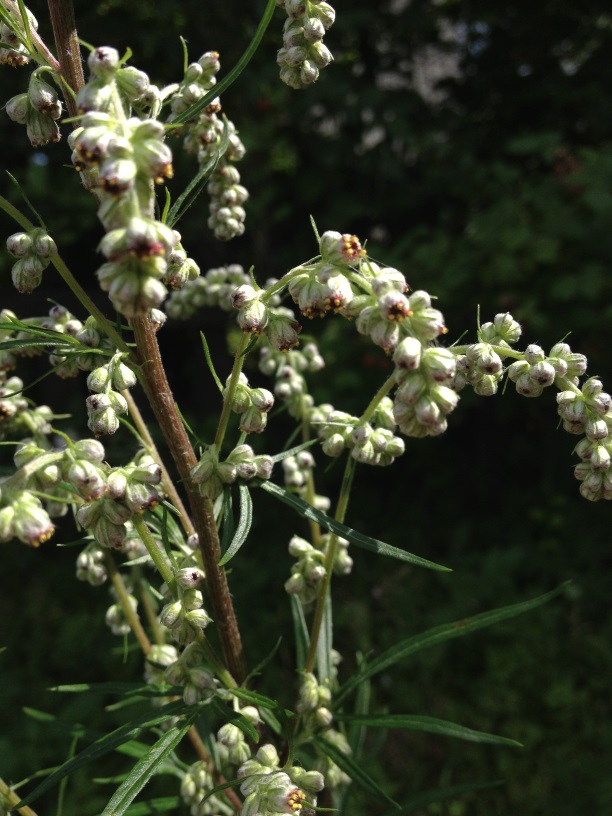
LA: Artemisia vulgaris EN: Mugwort FI: Pujo JP: ヨモギ近縁種 Location: Tampere Surrounding: Open field with good sun light. moist but not dump ground. other shorter plants grows around it. Note: Behind the leaves is covered with fine fiver, which is used for making moxa.
LA: Urtica dioica EN: Nettle FI: Nokkonen JP: セイヨウイラクサ Location: Tampere Surrounding: Open field with good sun light. moist but not dump ground. other plants grows around it. Note: entire plant is covered by tiny hair like stings. Contact on skin will give irritation. Leaves and seeds are edible. Fiver extracted from stem are very strong and used for making cordage and textile in primitive time.
LA: Fragaria vesca EN: Wild strawberry FI: Ahomansikka JP: ワイルドストロベリー Location: Tampere Surrounding: Sun light reaches, but not well. often seen on side of rode, but have also seen in the forest. moist but not dump ground. other plants of similarheight grows around it. Note: Fruit is edible and leaves can be made to tea. usually growing in cluster. Easy to ID by leaves, but even easier when fruits are in season.
As a part of IWG study, I must learn large mount of flora and fauna lives in Finnish wildness. It is must, because if a wilderness guide was asked on the job to ID some plant and he goes "... sorry, I am not familiar with this one...." to most of species, then what would be a point on being a Wilderness guide. The course and the examination required us to learn only important ones in Finland, so that is not that bad I though... till I saw the list. It covers the number of 350 species and need to learn them in 10 month, so that will make about 1 - 2 species per day. But as you can imagine, the best time to learn them are in summer time, so I have even shorter time to experience it to learn. I love learning the way of nature, but one thing I do not like is to sit on the desk to study. The only time I like sitting on desk is when updating my blog and making knives, so this is my way of moving my lazy study ass to start studying them: I will be posting 5 species per day on my blog!
(From the day 2, I will not include this series in IWG category. If you wanna follow this series, click on the categoriy "Flora & Fauna".)
The day 1
LA: Athyrium filix-femina EN: Lady Fern FI: Hiirenporras JP: N/A Location: Tampere Surrounding: Sun reaches well, but not strongly. not dump nor dry ground.
LA: Equisetum sylvaticum EN: Wood horsetail FI: metsäkorte JP: N/A Location: Tampere Surrounding: Sun does not reach well. Covered by canopy of taller plants. Usually seen in clustered. Note: Not to confuse with Equisetum arvense (Field Horsetail, Field Horsetail, スギナ), which is edible.
LA: Plantago major EN: Greater Plantain FI: Piharatamo JP: セイヨウオオバコ Location: Tampere Surrounding: Open filed often on the side or the rode where no other plants blocks the sun light. Note: Leaves and seeds are edible. Medicinal use for treating snake bite (used in the past), scarring and skin care.
LA: Trifolium medium EN: Zigzag Clover FI: Metsäapila JP: N/A Location: Tampere Surrounding: Good sun light. Growing with other plants of similar height. Note: Not to confuse with Trifolium pratense (Red Clover, puna-apila, ムラサキツメクサ) ID by white bow-shaped marking on leaves.
LA: Quercus robus EN: Pigweed FI: Jauhosavikka JP: シロザ Location: Tampere Surrounding: Very Good sun light. Growing with other plants. Quite dry or good water drainage ground. Note: Seeds and young leaves are edible but the leaves must be cooked, or might get allergic reaction. Seeds are high in protein, vitamin A, calcium, phosphorus, and potassium.
It was quite some time ago someone commented on my YouTube Channel that he would like to see my work space. I thought it might help, who are setting up his/her space, to see what others are doing. so here you go! It is not very special or different, but something does work for me!
As some of you may know, I will be going to attend the course "International Wilderness Guide" from august. the course takes 10 month and it covers all need to know about guiding clients in the forest. the study is a combination of desk study and practice in the woods and will have several 1-2 weeks trips and many small trips.
So, basically I will be spending most of days in the forest and it includes solo ski trip in deep snow lapland. I do have most of gears I would need, but still need to add/replace some.
One of it is a knife. I do have a knife which is very useful and I really like. with it, I can confidently say that could get by most of situations. but it is a knife originally designed for wood carving tasks and for the longer trip, I would be comfortable having more powerful knife.
So, here you go. my new knife for IWG trips.
I have been developing the idea of this knife for quite some time, so it is originally not designed for IWG and even have started making it before I decide to apply for the course.
This was the initial mock up. Full tang with Ainu-Makiri type handle.
The original plan mock up. Scaled up a tiny bit and changed to hidden tang. Sheath mock up was also made to see if Saami leuku type would work.
But as the work progresses and IWG came up on the way, I realized that if I would make it little larger than the original plan, it would make this knife suited for what I would be needing to do.
Luckily, I was little lazy when forging it and left quite a bit of material on blank. I decided not to grind it down to the original size, but keep the material as much as possible.
After forging.
Completed knife and original plan. see the size difference? the thickness was also added.
Then change in size was not an issue of making this knife, but it came from the makers stamp. again, it did not make deep crisp marking... I was getting tired of this stamp issue, the worst part is that I can not figure out what is wrong with it. is it me hitting wrong? or the stamp? Any how, I gave up the stamp and chiseled the mark. Not very good one but not bad ether. after all, this knife stays on my hands.
blade set on pitch while chiseling.
HT was smooth and nice, but the problem was waiting on unexpected place as always... When I started to drill the tang hole on the handle, the drill all the sudden start going side. I still do not know what went wrong there, but the drill just did not want to go straight. Since the wood I used was the last one. and howthorn wood of this size is quite difficult come by, I could not risk destroying it. changed the contraction method to 2 pieces handle, I split the wood in half - carve out the tang hole - glue it back. So on this knife, the largest concern is the strength of epoxy in extreme cold weather. it will be a good test of epoxy:)
The blade design of is inspired by Katana, mixed with leuku
Sheath and handle design inspired by Ainu people's Makiri Knife and Saami people's Leuku
The spine has a up swipe and blade belly to tip has a strong curve. This gives almost 14cm of cutting edge even the blade length is 12cm. also this edge curve gives the knife ability to cut with chisel like motion. this is very handy when making feather stick because it is much easier to control the cutting angle while pushing.
Using tip side to make feathering.
The grind is convex from the ridge line and cross-section of blade is diamond (pentagon) shape. this profile is good for less resistance when cutting in, but I choose this because of to give more agility on blade. Since this one is ling and wide (30mm at bottom), if has flat grind, it will be quite difficult to make good saddle notch like cut.
Try stick test. I skipped the ones I never have used or do not remember:)
Here are some cutting and usability test I made.
First up task is a try stick.
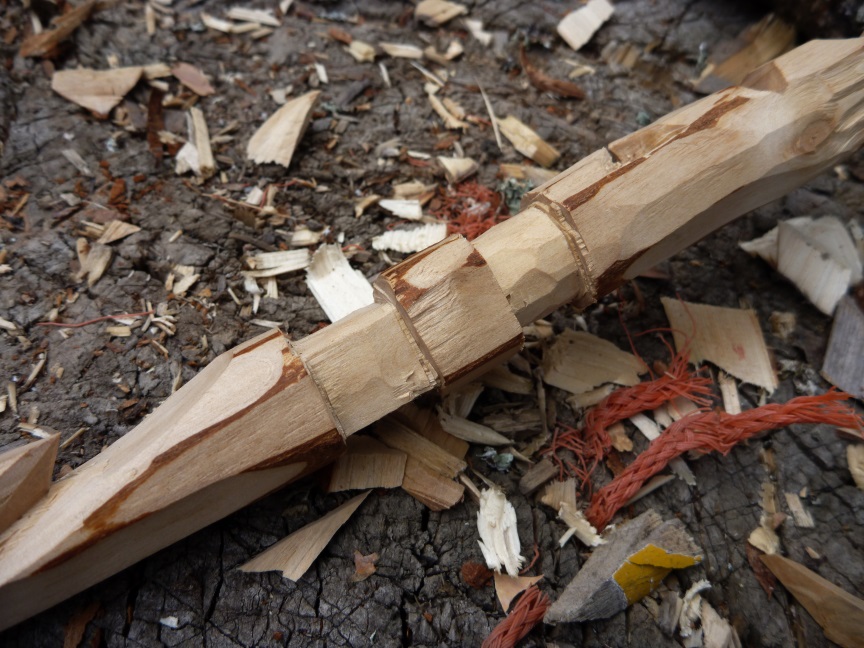
Tent peg and pot hook. easy ones but had first issue when making the hook... easy way to make this is to baton the X cut, then remove where not needed. As I start to baton as usual.. like tap - tap - tap... the blade blade just cut through. the wood was half dry birch. I know the power needed to do this right, but the blade was just too sharp. <- I did not know there is such thing as "Too sharp" :)
Square and round reduction. no issue on these.
Lashing cross, V-notch and saddle notch. Lashing cross, I had easiest time making. Saddle notch was not difficult at all but I know I can do this better with other knife.
Net needle and a spoon. The net needle was fail not because of the size, but again, too sharp. The blade just goes in to wood too easy and I could not control well. The last one is a spoon. I usually end the try stick with flower like feather stick, but I know this knife can do that comfortably, so took challenge and made tea spoon. Because of the size of the blade, I need to do some uncomfortable hold, but worked well and I have managed to cut decent hollow on the spoon.
for the second part of the test is the chopping and batonning. Picked up a good size birch with knot and blanch. this one, I took video, so here you go!
 LA: Aegopodium podagraria



 LA: Fragaria vesca